Wednesday, August 7, 2013

Recipe- Beet Chips

We went as a family up to Larriland Farm in MD and in addition to picking lots of berries and picking up the most beautiful kale, we got to pick our own beets!  So cool.  Since we paid by weight, we tore the greens off and left them - but now that I'm getting a cold press juicer, next time I am bringing those greens home to juice!  :-)

Preheat oven to 300 degrees.

I rinsed the beets well since they were covered in dirt.  Then I used a peeler to peel each one.  (Not my favorite part!)
That's a lot of peeling!

Then, I used the slice feature on my new food processor.  If I had a mandolin, I would have used that instead.  They slice thinner.
Then once I sliced all the beets, I put in a bowl and mixed with olive oil and salt until coated.
I also had a really great helper!
We layed them out on parchment paper on a baking sheet and put in the oven for one hour.  
They really shrink up.  I then lifted the parchment paper and dumped into a bowl.  
Beautiful and delicious.  My tiny taste tester preferred the super crispy ones...some were crispier than others due to differing thickness (again food processor not as good as mandolin) so I put them back in oven.  I planned on an extra ten mins, got distracted and without setting the timer, I burned those red beauties into charcoal!
So sad and a whole bunch of beets wasted!  At least we got to eat half of them before I decided to put them back in.  

Guess we will have to head back to the farm!

Even if you are not a fan of beets, try these!  Beets are so good for you!  Some athletes even coin them as "legal doping" :-)

Enjoy!

Product Review-Heads Up Bands

I was fortunate enough to recently try Heads Up Bands.  They make great non-slip headbands in a variety of colors and designs.  I got a few different designs and tested them out in a few different ways.

A day of running errands?  No slip!  Didn't even have to readjust once!

An hour of intense yoga?  No slip!  Wahoo!

14 mile run?  Oh baby, it stayed in place! 


Most headbands, my hair just doesn't seem to want to keep them in and they slide back along my head and I have to catch them before they fall off.  Not a good distraction when doing yoga or out for a run!  These headbands use a velvety inside and somehow it works like magic to stay in place...much better than bands with the silicone grippers.

If you get a chance to check them out, swing by their facebook page: https://www.facebook.com/HeadsUpBands and tell them Live Free And Run sent you!  They have a contest going on to win additional bands as well!

Their designs range from preppy prints, to sparkley, to sporty and they even have 13.1 and 26.2 bands!  I know a lot of you are racing those distances in the near future!  :-)

Go check them out and you will be happy you did.  I have been very pleased with my bands!

Check back on the blog in a few days.....I will be giving away some Heads Up Bands to a lucky winner!  It could be you! 

Tuesday, August 6, 2013

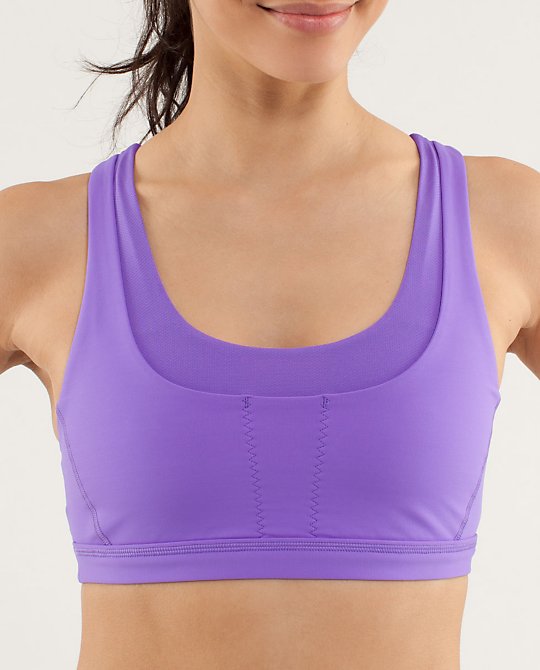
Product Review: LuluLemon Stuff Your Bra


So you all may remember, I had a dilemma of hating fuel belts, hating arm bands, but no where to put my ipod, fuel, etc.  I had found the North Face Stow and Go and I really did enjoy that bra.  That review here.  But the downside that I had was that it was a bit tight around the ribcage for me.  (Another reader mentioned this happened to her too)  Which wasn't entirely terrible while wearing a shirt, but when I would run shirtless, that's where the problem occured.  It squeezed me and was a bit unslightly.  In pictures, it makes it look like my boob is trying to escape, it's not, it's just the way my skin is pinched!  Not good. 


Anyway, I learned Lulu now made a sports bra with a pocket.  I bought one this weekend on my way home from the DCAC fitness conference in Reston, VA.  I just took it on my 7 miler this week and I LOVED it.  It comes in very fun colors (to match their other gear) and it was very comfortable.  The pocket is divided into 3 sections, so it is a smaller pocket overall than the Stow and Go by North Face.  It held my ipod nano and a Honey Stinger each in a pocket of the bra just fine. 

I bought the purple one: http://shop.lululemon.com/products/clothes-accessories/women-sports-bras/Run-Stuff-Your-Bra-II  and I am very happy with the fit and color.


RUN:Stuff Your Bra II

Recipe-Spaghetti and Eggplant "Meatballs" with fresh tomato sauce

Active time: 45 mins
Total time: 1:45

I tend to double the "meatball" and sauce recipe and save the extra.  I jar the sauce and freeze the extra balls.

For the Eggplant "meatballs":
3 large eggplants, roasted until soft.  (Tip: This can be done up to a day ahead) Preheat oven to 400 and lightly grease two baking sheets with olive oil.  Poke the whole eggplant with a fork several time.  Bake for one hour until completely softened. Then slice in half, and spoon out the flesh.  Discard the skins.  Roughly chop the flesh in a large bowl and set aside).

1/2 cup chopped onion
2 cloves of garlic sliced, I used the frozen pre-minced cubes from Trader Joes
1/3 cup walnuts
2 tablespoons of yellow miso (it's so good for you and it's found in the refrigerated section near the tofu)
1 1/2 cups whole wheat or brown rice bread crumbs
1 tablespoon italian seasoning (oregano, rosemary, etc)
1/4 teaspoon sea salt
1/4 cup finely chopped basil
1 tablespoon olive oil


You could also double the meatball recipe and then freeze them to recreate this dish much faster next time :-)

For the sauce:
1/4 cup olive oil
1 small onion, diced
2 cloves of garlic, sliced
pinch of salt
8 medium tomatoes, seeded and roughly chopped
1/4 cup fresh chopped basil


For serving:
16 oz of whole wheat or brown rice spaghetti
Chopped basil and Parmesan cheese for garnish

1. Preheat the oven to 375 and grease two baking sheets with olive oil
2. Place the onion, garlic and walnuts in a food processor and process until very finely chopped.  Add the miso and process again to form a paste.
3. Add the onion mixture to the eggplant, along with the breadcrumbs, seasoning and salt. Use a fork or your hands to mix until combined.  If necessary, add more breadcrumbs by the spoonful until you reach a slightly sticky consistency.  Fold in the basil.
4.   Form the mixture into golf size balls and place on baking sheet.  Use pastry brush to brush tops with olive oil.  Bake for 35 minutes, until slightly browned and springs back when you press it.
5. While the eggplant balls bake, make the sauce.  In a large pot, warm the olive oil over medium heat.  Add the onion, garlic and pinch of salt and saute for 5-7 mins, until soft.  Add tomatoes and another pinch of salt.  Turn down the heat and bring to a low simmer for 15-20 mins.  Add the basil and keep the sauce warm over low heat until ready to use.
6. While the sauce simmers, cook the pasta according to package directions. 
7.  When each item is done, serve spaghetti topped with sauce and meatballs.  Top with basil and Parmesan cheese. 

If you have left overs, you can store the extra meatballs by freezing them or in a separate container.  Combine the leftover pasta with the leftover sauce and store together.  The flavors really meld together and make WONDERFUL leftovers! 


Thursday, August 1, 2013

Recipe- Buffalo Quinoa Salad

A quick and easy lunch!  Especially if you always have quinoa pre-prepared in the fridge like I do!

A few heaping handfuls of fresh baby spinach
I cup prepared quinoa 
1-2 tablespoons buffalo sauce
Blue cheese crumbles

I lay the base with the fresh spinach.  I warm the quinoa in the microwave and mix with buffalo sauce.  Top the spinach with the buffalo quinoa and top with blue cheese crumbles.  

So easy and so yummy!  I plan on bringing this when I head to work in a few weeks too!